Mapping CoD4 ( tuto )
140 - La pluie (add rain)
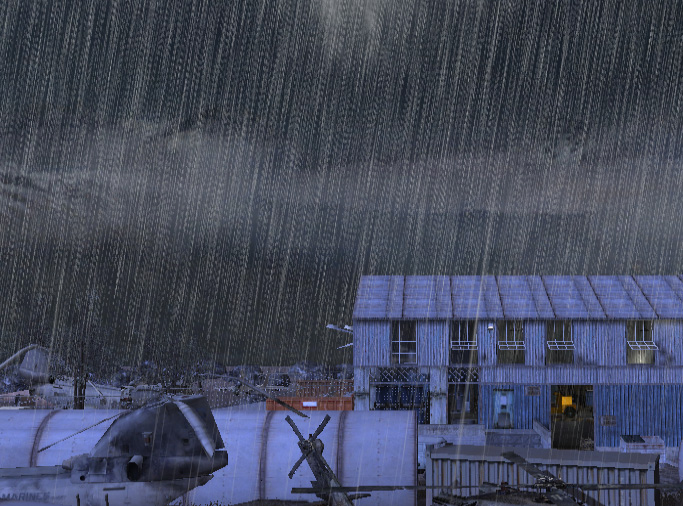
Ajouter de la pluie comme les autres effets

2 solutions, avec radiant, ou en utilisant les fichiers .gsc voir le tuto "ajouter des effets", dans cet exemple, j'ai utilisé la méthode avec les fichier ".gsc"
Avec cette méthode,
dans radiant, la seule chose à faire c'est se noter les coordonnées, où seront les effets de la pluie, les éclairs, etc...
Suivant la taille de votre map, il faudra dupliquer le pluie à différents endroits, si vous voulez que la pluie tombe de manière uniforme sur toute la map...
Une fois les coordonnées notées sur un bout de papier...

2 solutions, with radiant, or using .gsc files see the tutorial "add effects",
in this example, I used the method with ".gsc" files
With this method,
in Radiant, all you have to do is write down the coordinates where the rain, lightning, etc. will be.
Depending on the size of your map, you'll need to duplicate the rain in different locations if you want it to fall evenly across the entire map.
Once you've written down the coordinates on a piece of paper...
..\raw\maps\mp\mp_nomdevotremap_fx.gsc
Dans le dossier (in the folder) ..\raw\maps\mp\si vous ne l'avez pas encore créé, il faut donc créer un fichier nommé : mp_nomdevotremap_fx.gsc,
Appel des différentes effets, la pluie, les éclairs, le son de la pluie qui tombe... etc..
et voici un exemple du contenu :
If you haven't already created, you need to create a file named: mp_nameofyourmap_fx.gsc,
Call the various effects: rain, lightning, the sound of falling rain, etc.
Here's an example of the contents:
main()
{
level._effect[ "rain_heavy_mist" ] = loadfx("weather/rain_mp_farm");
level._effect[ "lightning" ] = loadfx("weather/lightning_mp_farm");
level._effect[ "water_noise_ud" ] = loadfx( "ambient_runners/mp_farm_water_noise_ud01" ); level._effect[ "water_noise" ] = loadfx( "ambient_runners/mp_farm_water_noise01" );
/#
if ( getdvar( "clientSideEffects" ) != "1" )
maps\createfx\mp_nomdevotremap_fx::main();
#
}
..\raw\maps\createfx\mp_nomdevotremap_fx.gsc
Dans le dossier (in the folder)..\raw\maps\createfx\Si le dossier "createfx" n'existe pas, créez le.
Puis créez ou modifiez votre fichier nommé : mp_nomdevotremap_fx.gsc.
Ici, on trouve, les emplacements des différents effets, (dans cet exemple, j'ai volontairement dupliqué la pluie à 2 endroits et donc 2 coordonnées),
voici un exemple...
If the "createfx" folder doesn't exist, create it.
Then create or modify your file named: mp_nameofyourmap_fx.gsc.
Here you'll find the locations of the various effects (in this example, I deliberately duplicated the rain in 2 locations and therefore you are 2 coordinates).
Here's an example...
main()
{
ent = maps\mp\_utility::createOneshotEffect( "weather/rain_mp_farm");
ent.v[ "origin" ] = ( X, Y, Z );
ent.v[ "angles" ] = ( 270, 0, 0 );
ent.v[ "fxid" ] = "rain_heavy_mist";
ent.v[ "delay" ] = -1;
ent = maps\mp\_utility::createOneshotEffect( "weather/rain_mp_farm");
ent.v[ "origin" ] = ( X1, Y1, Z1 );
ent.v[ "angles" ] = ( 270, 0, 0 );
ent.v[ "fxid" ] = "rain_heavy_mist";
ent.v[ "delay" ] = -1;
ent = maps\mp\_utility::createOneshotEffect( "weather/lightning_mp_farm");
ent.v[ "origin" ] = (X, Y, Z );
ent.v[ "angles" ] = ( 270, 0, 0 );
ent.v[ "fxid" ] = "lightning";
ent.v[ "delay" ] = -1;
ent = maps\mp\_utility::createOneshotEffect( "water_noise_ud" );
ent.v[ "origin" ] = ( 0, 0, 0 );
ent.v[ "angles" ] = ( 270, 0, 0 );
ent.v[ "fxid" ] = "water_noise_ud";
ent.v[ "delay" ] = -15;
ent = maps\mp\_utility::createOneshotEffect( "water_noise" );
ent.v[ "origin" ] = ( 0, 0, 0 );
ent.v[ "angles" ] = ( 270, 0, 0 );
ent.v[ "fxid" ] = "water_noise";
ent.v[ "delay" ] = -15;
}
CompileTools, Update zone file
Dans le compile tools,

Dans la zone de droite, ajoutez ces 2 lignes :
(In the right area, add these 2 lines:)
fx, weather/rain_mp_farm
fx, weather/lightning_mp_farm
Puis compiler votre map
et voilà, c'est terminé.